
Manually configuring your Yealink phone to your Dial 9 extension
To manually set up your Yealink device you will need access to the Dial 9 Portal to get the extension login details and the Yealink web ui to enter the details.
If you are not familiar with the process for accessing the Dial 9 portal a guide can be found Here.
To access the web UI for your Yealink phone you will need to enter the IP address for the Yealink device in a web browser. The IP address can be found by pressing the OK button on the phone. The default login credentials for Yealink are admin/admin.
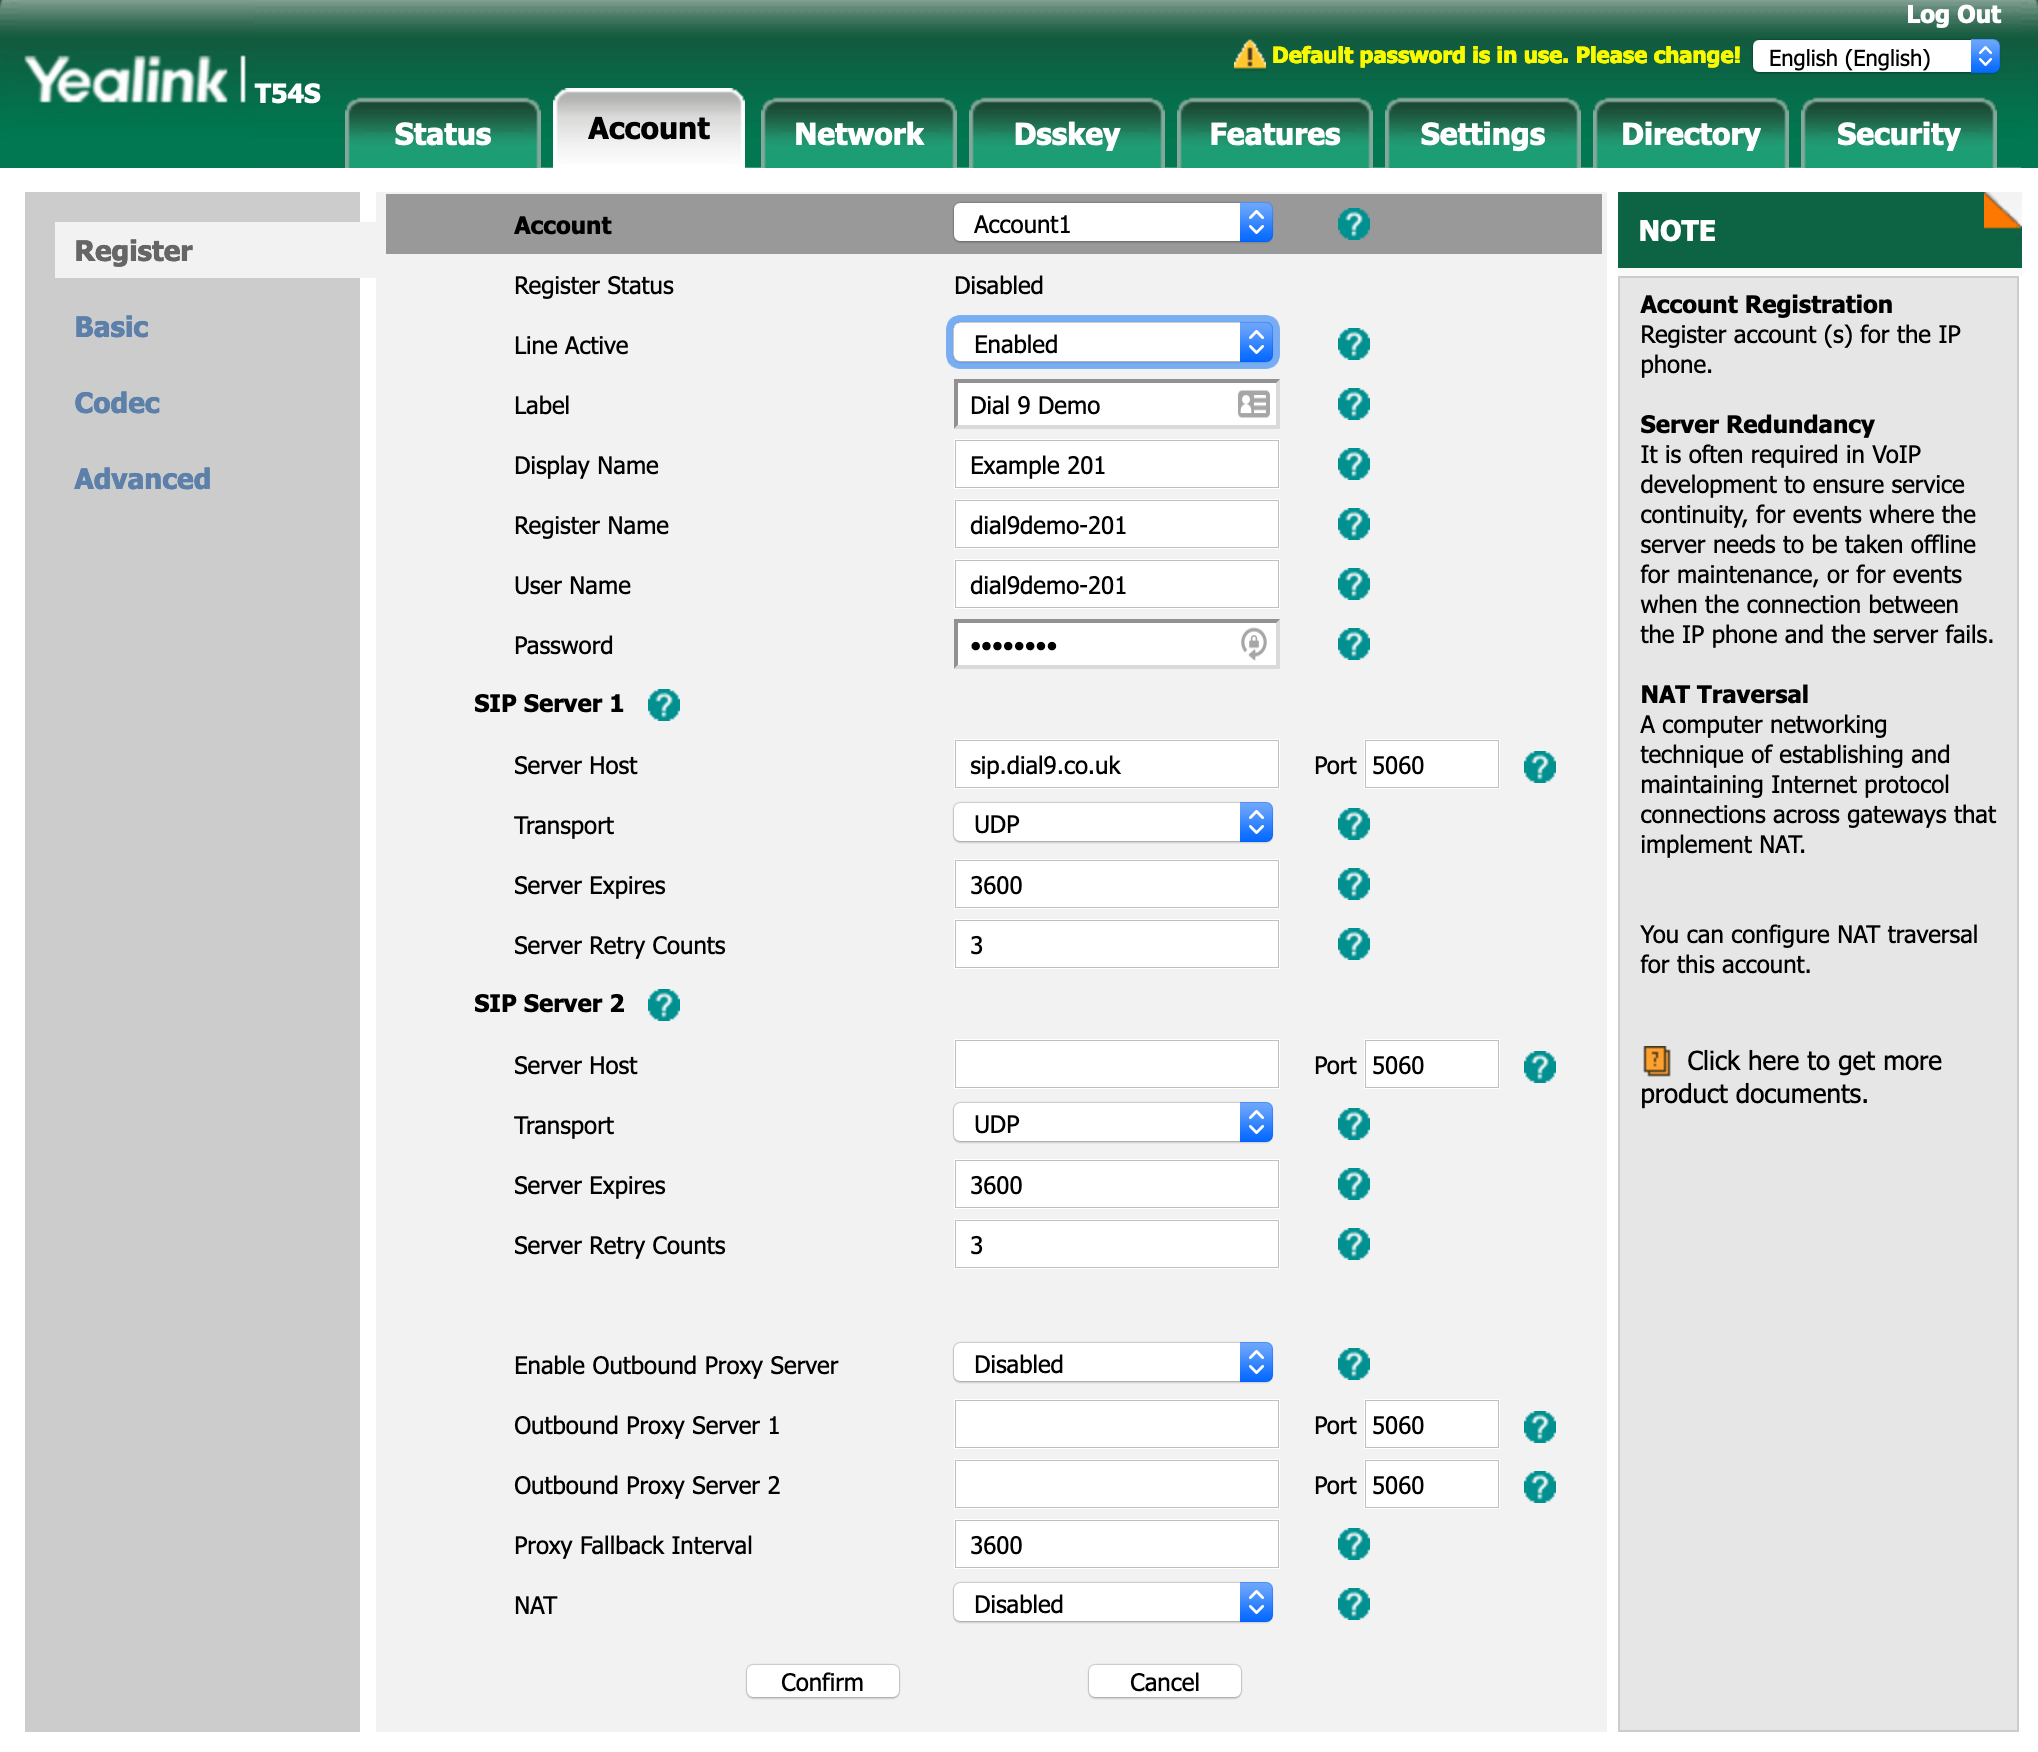
Once logged into the Yealink web UI select Account.
You will need to edit the following settings:
Line Active - Enabled
Label - The name of your system or company
Display Name - A name of your chosing, a good idea would be the extension name
Register Name - This will be the same as the User Name field
User Name - This can be found in the Dial 9 Portal, you would need to include the prefix
Password - This can be found in the Dial 9 Portal
Server Host - This can be found in the Dial 9 Portal, below the Extension password
When all of the required information has been entered, press Confirm at the bottom of the page.
To configure your voicemail key for access to your Dial 9 voicemail, please select Advanced and enter *55 into the Voice Mail field.
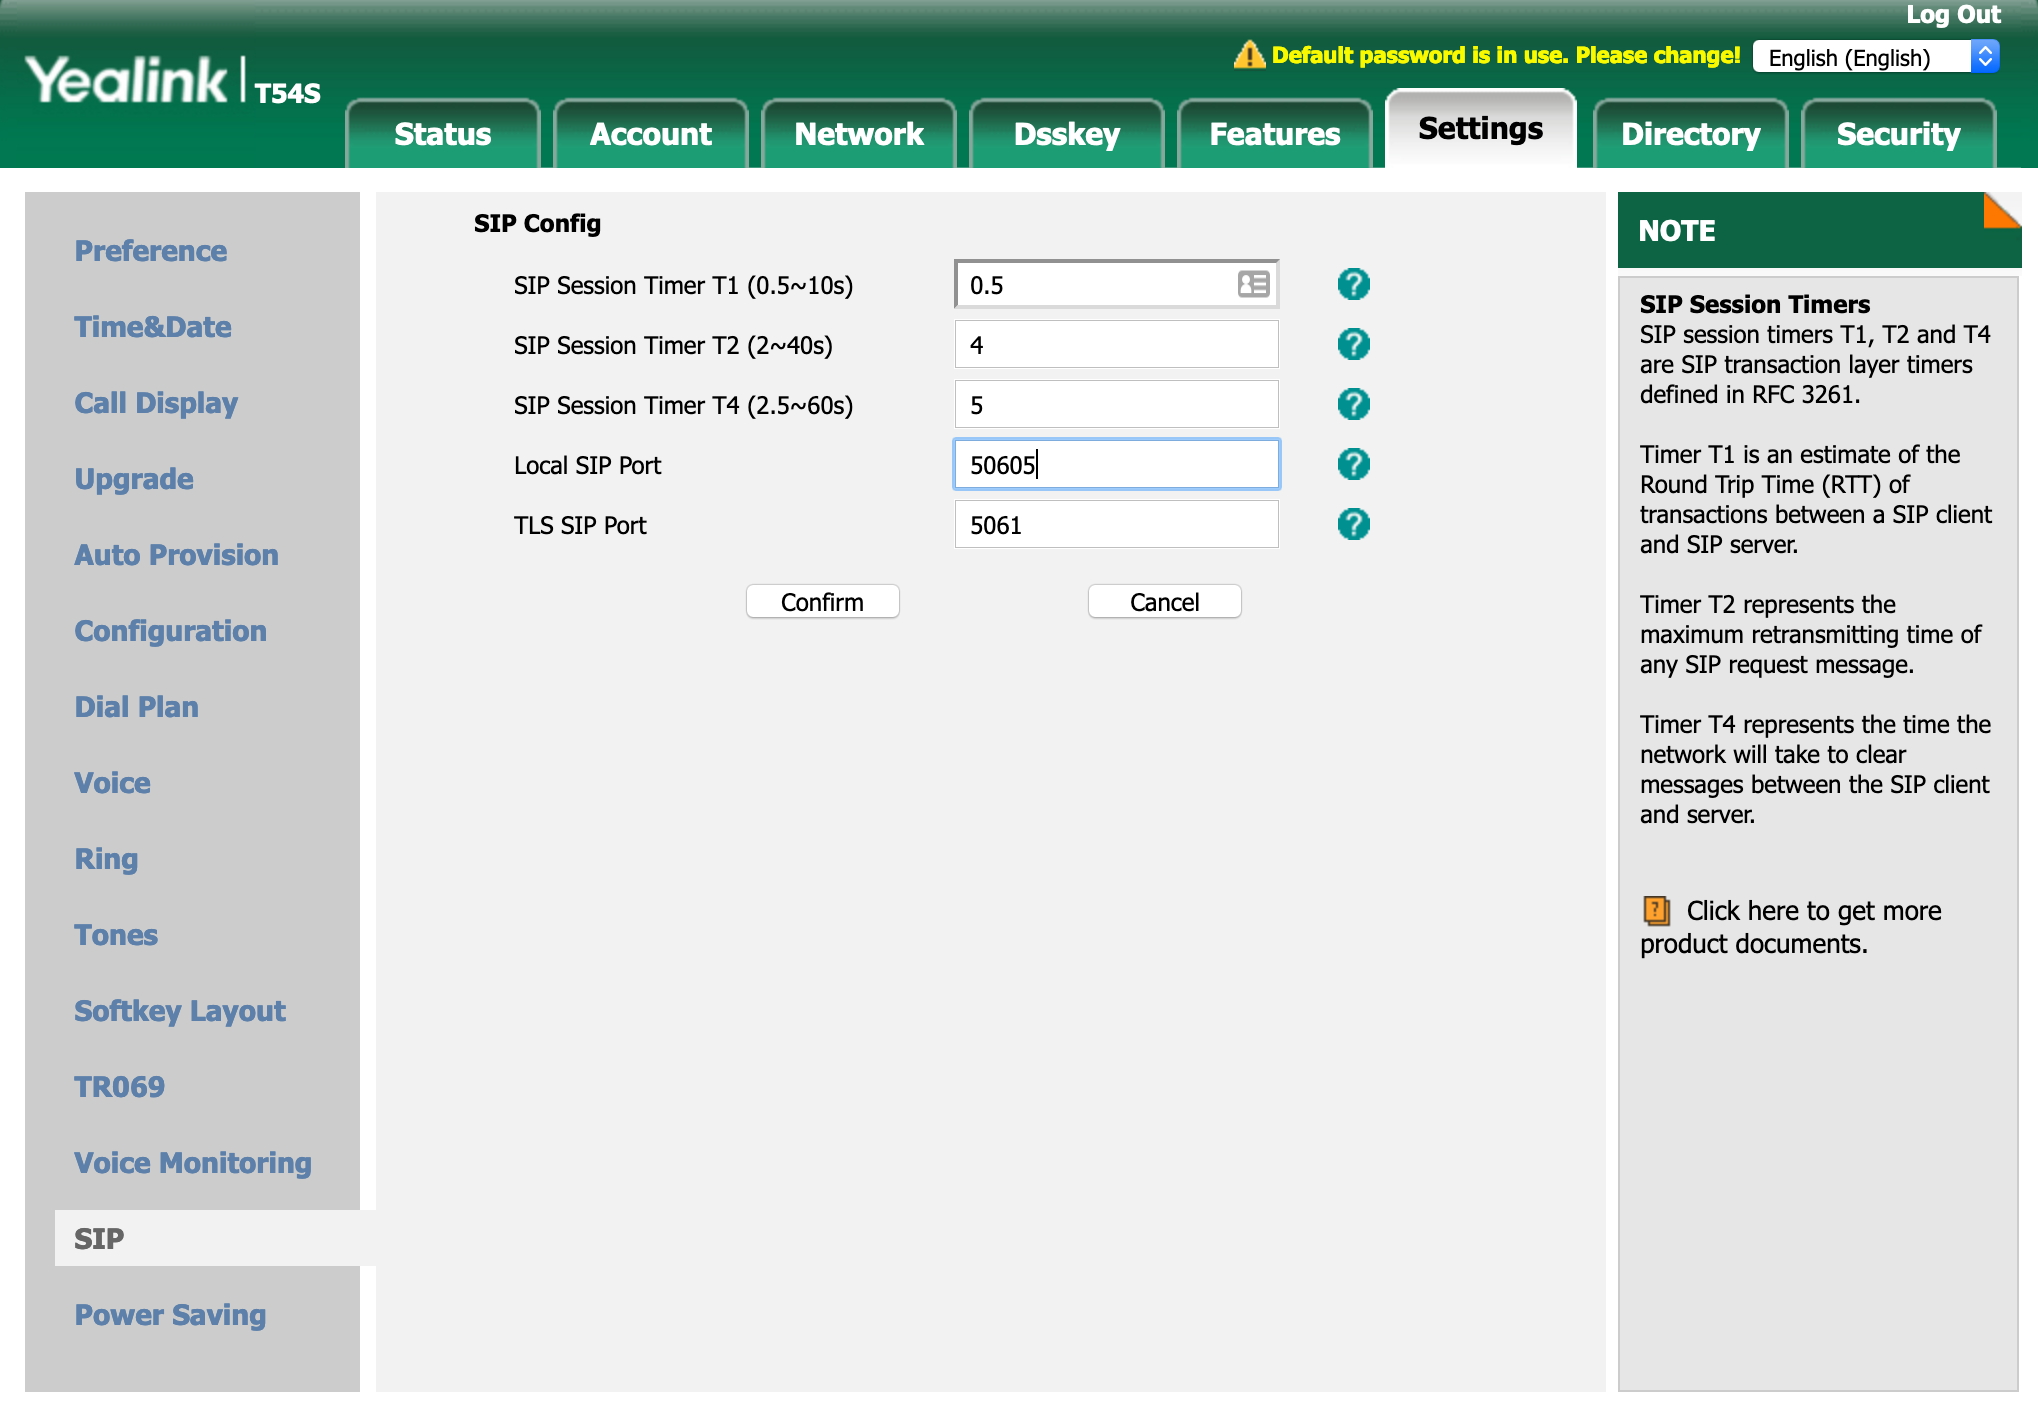
It’s also recommended that you change the local SIP port, this will help to prevent unsolicited SIP traffic such as ghost calls where you may not have control over your local firewall to be able to lock down your incoming traffic to only Dial 9's network.
The default port is 5060, we recommend changing this to any random 5 digit number.
A video guide can also be found on our Youtube channel here.